When I created this website one of the things that I had left aside (to do later), it was to enable the https version of the site. That means I didn’t install any certificate, so everyone could access my website only through port 80 and not the secure port 443.
I postponed the whole thing all the time, even though I had done it in the past in multi occasions. The easy way is to use Let’s Encrypt, a free, automated, and open Certificate Authority. The thing is that a certificate from Let’s Encrypt expires after 90 days (instead of a year or years that other paid authorities have). In many case this problem can be resolved with an automation that a script can provide.
The way that certificates work needs some studying in order to understand how that ecosystem works. Personally, I had a deep dive into it in order to manage more than a dozen certificates from many services and applications that we use in the company that I work for. At first, certificates were a “no touch” thing for me, something that came from the lack of knowledge on the matter. But, I had to learn it the hard way, but everything worked fine. So, I decided to add a certificate to this site, which is on Microsoft Azure.
HTTPS on Azure the easy way
Microsoft has made some progress on how to add a certificate to your website and that to be able to renew it automatically and adding Let’s Encrypt to the list was a a great addition to our arsenal. There are couple of blog posts on the matter, but the Azure Portal keeps changing so I decided to create this article and I will try to keep it updated whenever Microsoft decides to change things within the portal, plus this website serves also as my personal notepad on this I use, so it’s more easy to get back to my posts.
LET’S DIVE
STEP 1
I have created this site as an App Service, but know I need to connect it in order to be under the Azure Active Directory. The first step is to go to App Registrations and there we add a New Registration


I named the App Registration Let’s Encrypt – BlackTrack
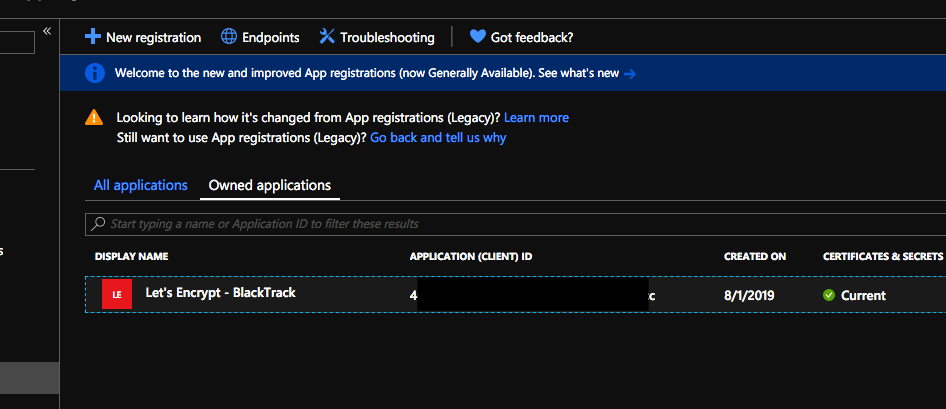
After you register your app, you need to keep that Application (client) ID. You will need it later.
STEP 2
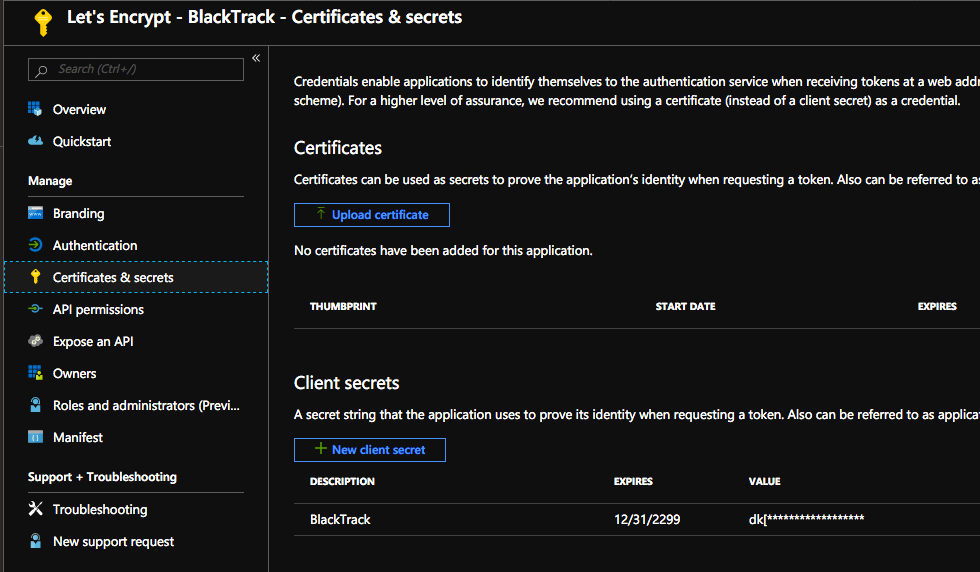
Next you need to choose that registration and you will need to create a new CLIENT SECRET.
NOTE – when the value of the password appears, COPY and PASTE it to a notepad. You won’t be able to see the value again. We will need this value later as well
STEP 3
Next, you need to go to your App Service and then to add to create a new role assignment to the Azure AD registration that we created, so this can have access to our service (that means the website).
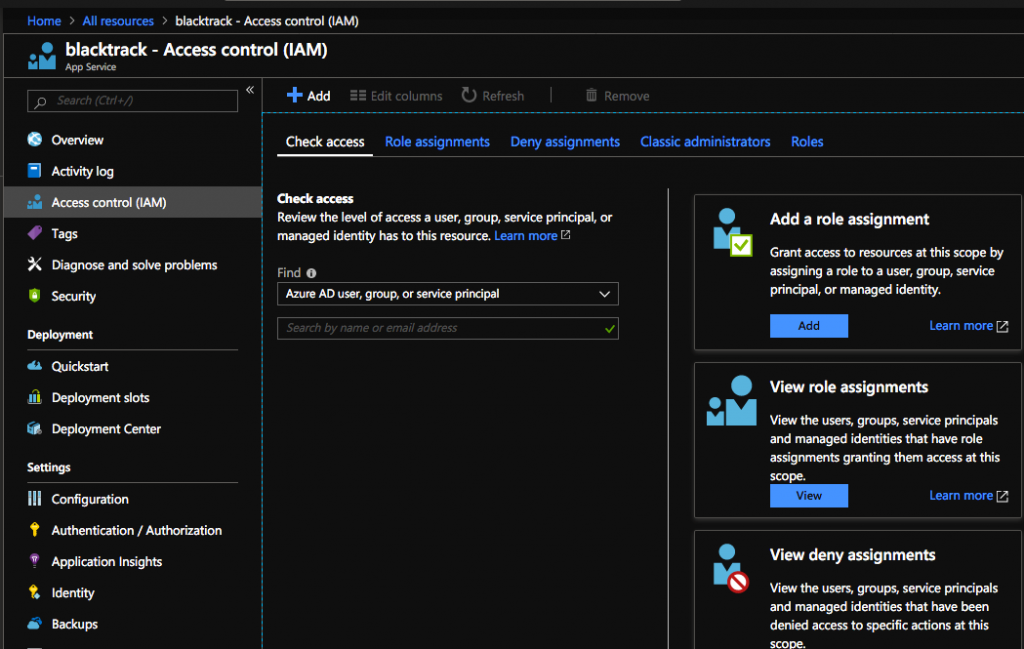
Choose as the picture below. Select the name-user that you created at the APP REGISTRATION at step 1.


Head over to your App Service again and click Extensions

Add extension and choose Azure Let’s Encrypt (choose and accept the legal terms) and then you can choose OK to complete.

STEP 4
Choose your App
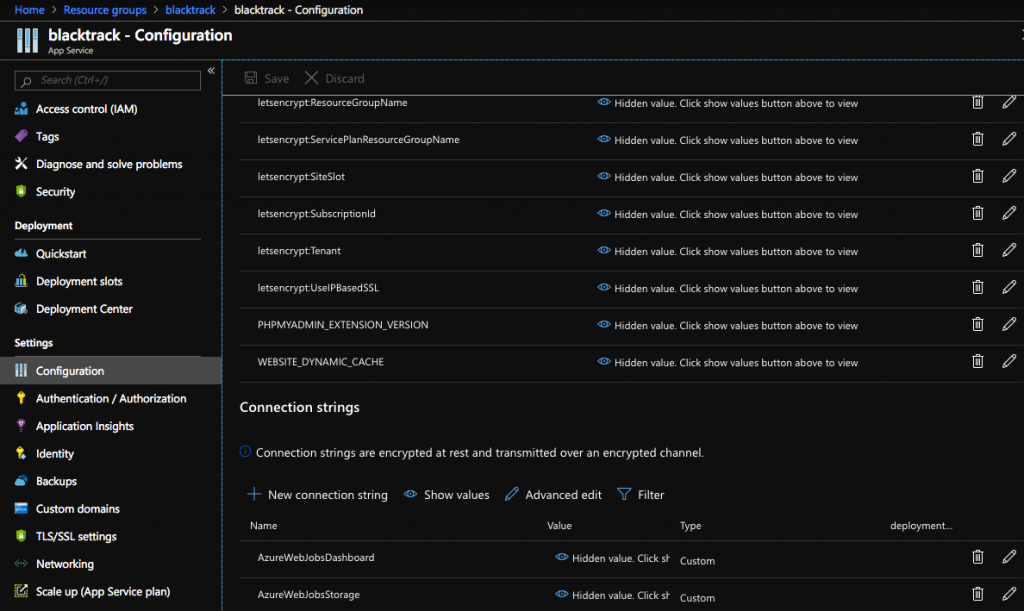
Service again and choose Configuration and add the following connection strings
Name
AzureWebJobsDashboard and AzureWebJobsStorage
The Value can
be found at the App Service’s Resource Group and
choose the storage account (you need to create a storage account to that
resource group if you haven’t already). Then click the Access Keys and copy
paste the connection string from KEY1
YOU WILL USE THAT STRING FOR BOTH AzureWebJobsDashboard and AzureWebJobsStorage
The “Type” will be CUSTOM for both strings
(DON’T FORGET TO SAVE after you add those two strings)
STEP 5
Go to the page http://YOURSITENAME.scm.azurewebsites.net/LetsEncrypt If you have done everything right you will see the following picture (if not, you might need to restart your App Service)

Explanation
Tenant: you can find this at your Subscriptions. It should be the subscription that you use for the App Service. (the Directory)
Subscription ID: The ID of your Subscription (you can find it at the same page as the above)
Client ID: The first one that I told you to save (Application – Client ID)
ClientSecret: The second one that I told you to keep (if you haven’t keep this, you need to create a new Secret)
ResourceGroupName: The actual name of your resource group name – (The one that your App Service is part of)
ServicePlanResourceGroupName: most people have the same as the above
WebAppName: the name of your App Service
Next
Tick on Update Application Settings and push NEXT
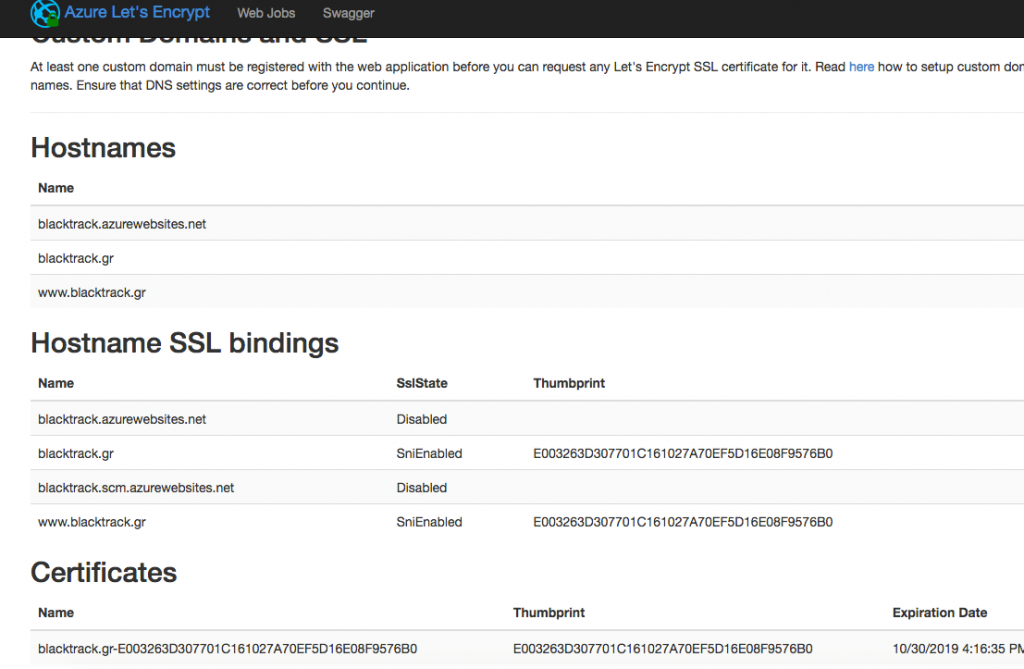
If you have done everything right, then you will be leaded to the next page where you can see your hostnames, your SSL binding etc. If you don’t see that, then probably you will see the same page where you post your previous information with a big error message in red letters where it explains what you did wrong (I post the name of the secret and not the secret itself. I had to delete the previous secret and create a new one in order to copy paste the secret value.
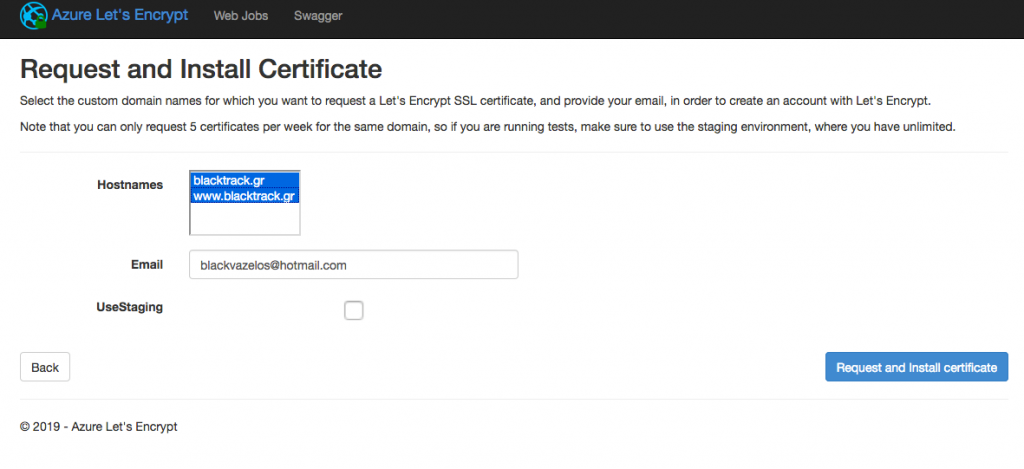
If you see the page with the hostnames etc, then you click on NEXT and then you will see the next page where you have to choose the hostnames that the SSL will be applied. (Hold ctrl key to choose all, if you have more than one). Then click on NEXT and the Certificate will be installed and you will see the page with the hostnames, ssl bindings etc and next to the hostnames you chose you will see SnlEnabled under the SslState.
Step 6 (the final step)
Head back to the Azure Portal and your App Service and choose TLS/SSL Settings
There choose to enable HTTPS Only if you’d like Azure itself to ensure and redirect all non-secure links to https:// (preferable choose TLS version 1.2)

Now as you are reading this post on this site we are on https://


All are set up! Ready to go!
Have you checked on how Serial Console works?
